背景
elk为常见的日志分析平台,在很多公司都用使用,但是日志数据是一个不断海量增加的东西,如果没有太大的存储来存储这些日志历史数据,就会需要删除时间过长的历史数据,以保证数据量可控。
方法
elk中elasticsearch为搜索引擎,也是数据的储存单元。要想实现只保留固定时间的数据,这里以7天为例,要想每个索引的数据都只保留最近7天的数据,大于7天的则删除,有两种方法:
看你的索引是怎么样的,如果你的索引名称中有时间,比如logstash-2019-01-02 这样,就是每天都会生成一个新的索引,这样的话可以使用官方的Curator 工具
如果你的索引中不带时间,比如,如果是根据应用或者服务名来命名的,那么注意,Curator是无法实现删除索中的某一段数据的!!这里需要特别注意,网上很多说可以实现的,那是因为他们的索引如上面1 所说,是根据时间日期来生成的。但实际上,很多索引都不是这样的,按正常的思维,更容易用服务名或应用名作为索引,以此来区分日志所属应用,方便日志的分析对应指定的应用。这种时候需要使用elasticsearch的api:delete_by_query来进行删除指定数据。这种方法也是通用的,更推荐用这种方法。
使用API
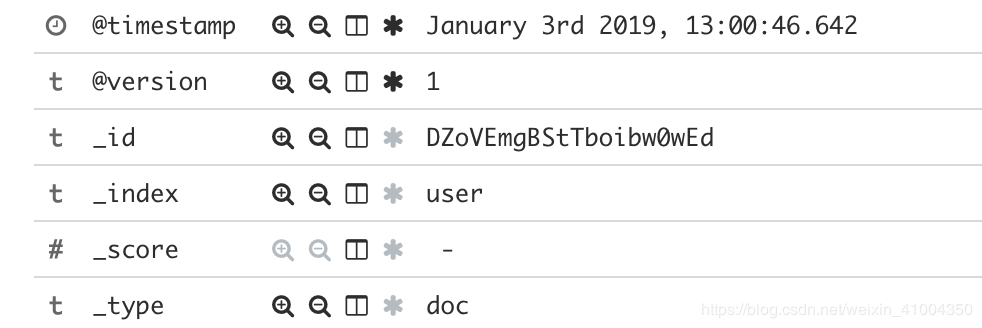
删除指定的数据,需要使用到delete_by_query接口,这里需要科普一下,在elk中,每一条日志数据就是一个doc文档,如下:每条数据都会有一个_index,_type,_id 分别就是索引,类型,id。
1 | delete_by_query的接口格式如下: |
下面以删除所有索引,超过7天的历史数据为例,用python写成的脚本如下,可以直接拿去用
1 |
|
以上,就是一个完整的删除索引的历史数据的一个脚本,然后只需要将此脚本添加到crontab中,每天定时执行以此就可以实现只保留固定时间的数据了。
Es Curator
简介
curator 是一个官方的,可以管理elasticsearch索引的工具,可以实现创建,删除,段合并等等操作。
文档
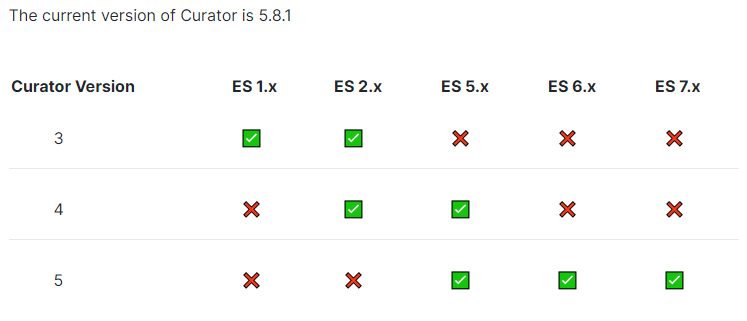
版本
安装
安装非常简单,直接通过pip安装即可。 其他安装方案,详见官方文档:安装
1 | pip install elasticsearch-curator |
使用
安装后,便可以在命令行中直接使用,使用–help查看一下使用方法
1 | curator --help |
看到使用需要定义两个文件,一个配置文件 curator,.yml 和 操作文件 action.yml
配置文件 curator.yml 示例如下: 详细的配置文件配置方法,详见官方文档: 配置文件curator.yml
1 | client: |
然后就是action.yml 文件,定义需要执行的操作,我们这里需要删除索引中时间过长的历史数据,详细的操作文件action.yml配置的字段和用法,详见官方文档:
1 | actions: |
ok,定义了两个文件后,则可以直接使用命令行进行执行:指定两个文件的路径即可。
1 | curator --config curator.yml action.yml |
最后,将此命令添加到crontab中即可。

